So I got a wild idea. What if I took the golf mat I stand on and insert a hitting mat. In other words, a DIY golf mat. The mat I was standing on was comfortable, but was a pain in the joints to hit off of. Meaning my elbow and wrists hurt from the hundreds upon hundreds of balls that I hit. So in the meantime, while researching reviews I picked up a nice mat to hit off of.
It is the Fiberbuilt Flight Deck and it has been fantastic. The pain in the elbows and wrists are gone. The only thing with the Fiberbuilt Flight Deck is that you cannot stand on it. Now the Fiberbuilt Practice Station is a product you can both stand on and hit off. For me, at the time I didn’t want to outlay the cash. But then I suppose we wouldn’t be having this conversation.
I should say that all of this work (maybe a couple of hours) is so I can hit balls in my golf cave or what many call a golf simulator. I built an enclosure with an impact screen. It is 8′ tall by 8′ wide. I currently just use a photographer’s backdrop based on a recommendation. I put down 3/4″ EVA Puzzle Mat Foam and put an artificial turf on top of that. For my launch monitor, I did use SkyTrak OG but have since moved on to Bushnell Launch Pro. Works well with my current setup.
So the thought process was to be able to hit off the mat I was standing on. And for the “feel” to be like real turf. The inexpensive mat I bought off Amazon many years ago is 3′ x 5′ so it would work.
I found a company who makes hitting insert strips and they go by the name of DivotAction™. I would share their website but at the moment am getting a certificate error message and warning. Anyway, I decided if they could build such an insert that I would give my hand at what should be a cool DIY golf mat project. And so it began.
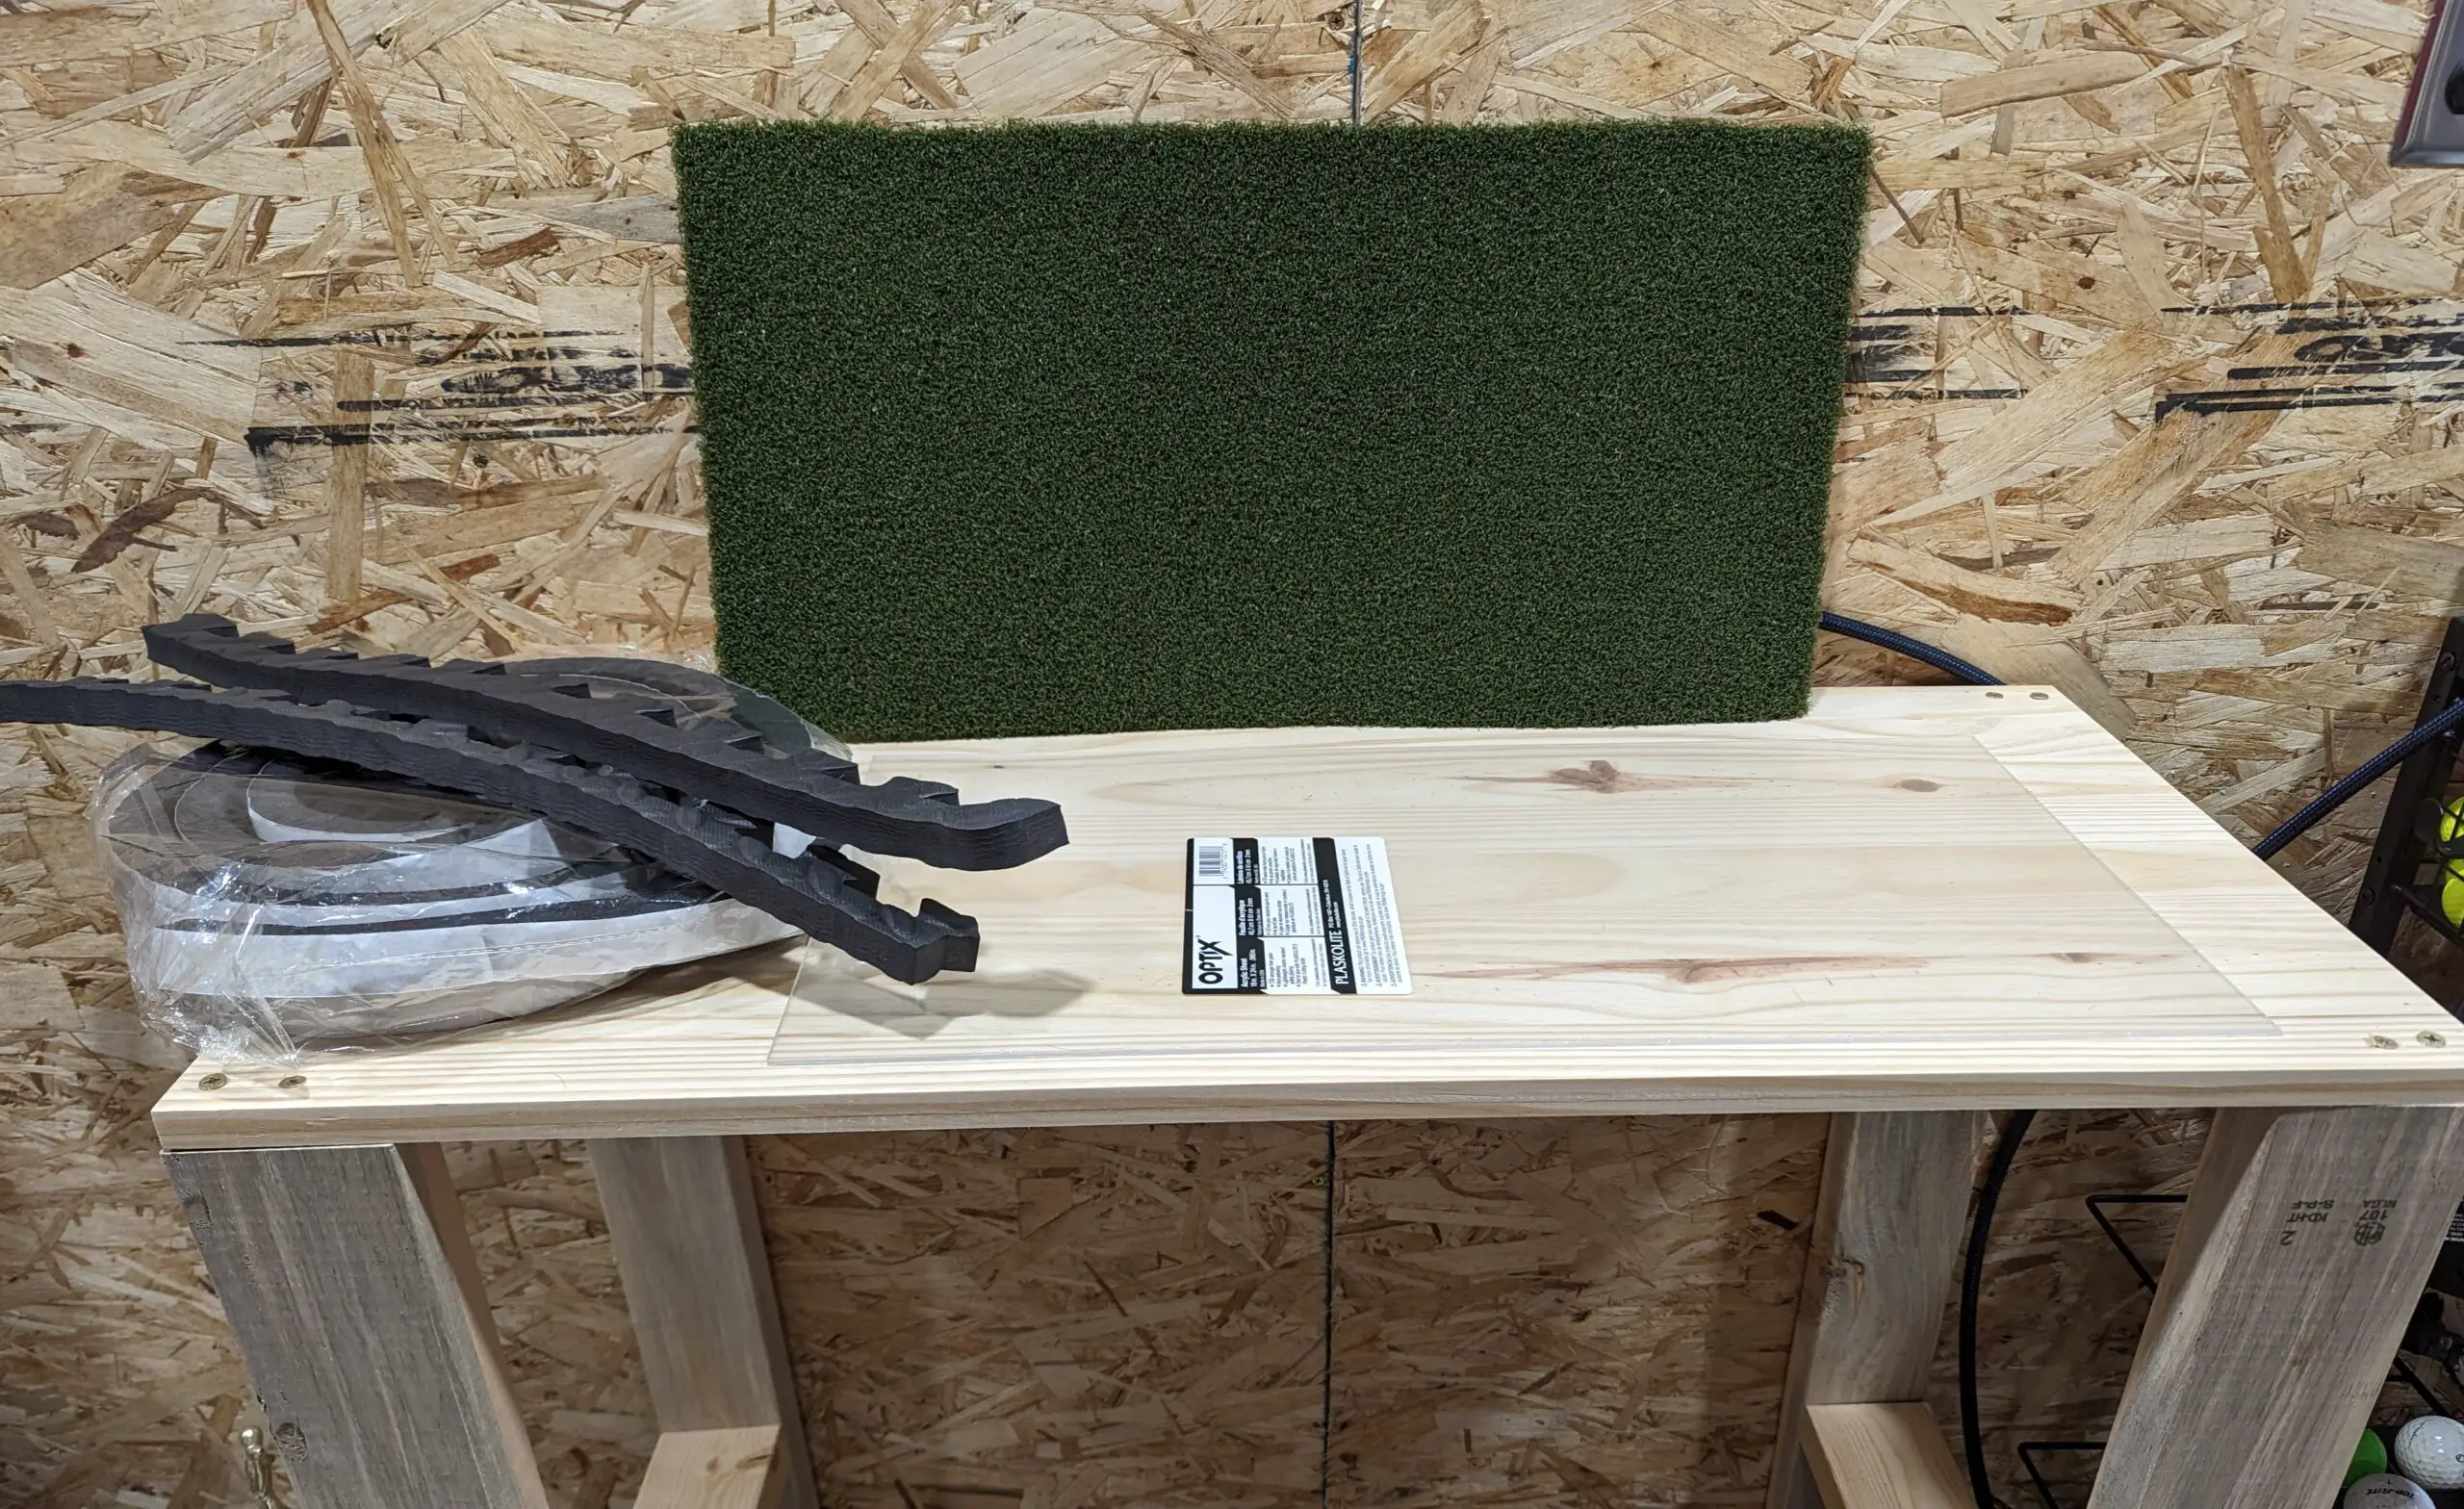
DIY Golf Mat Materials:
- Money Putt by Grass-Tex Hitting Strip Turf from One Stop Sim Shop
-
LEXAN Polycarbonate 0.093-in from Lowes for more of a cushion or LEXAN Polycarbonate 0.118-in to lessen the chance of cracking the polycarbonate sheet.
-
3/4″ Thick Flooring Puzzle Exercise Mat with High Quality EVA Foam
-
Foam Insulation Tape – 1″ wide by 3/4″ tall
- Caulk Gun and Power Grab Adhesive
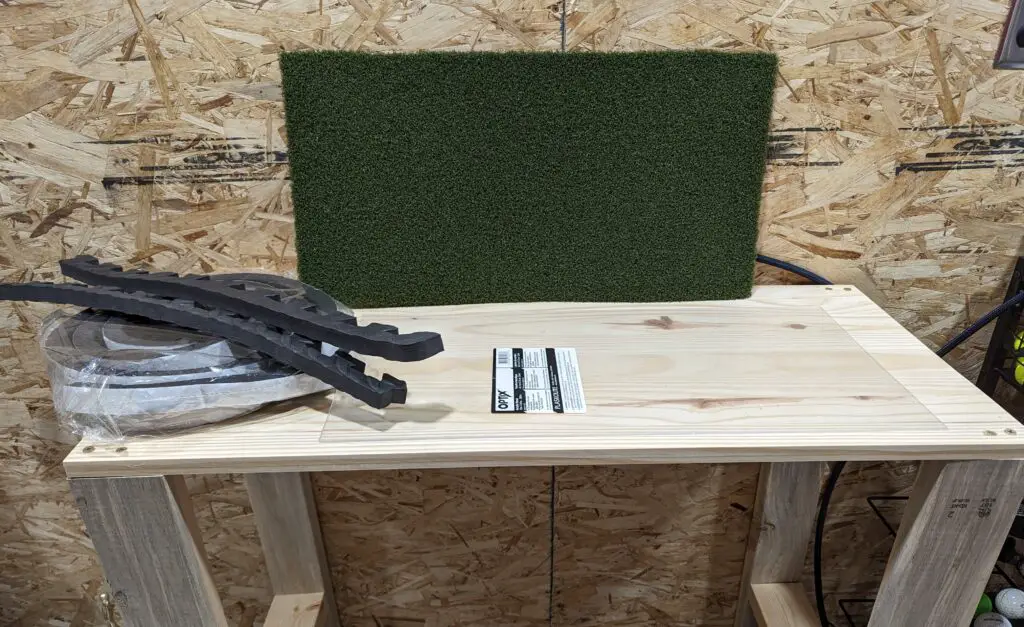
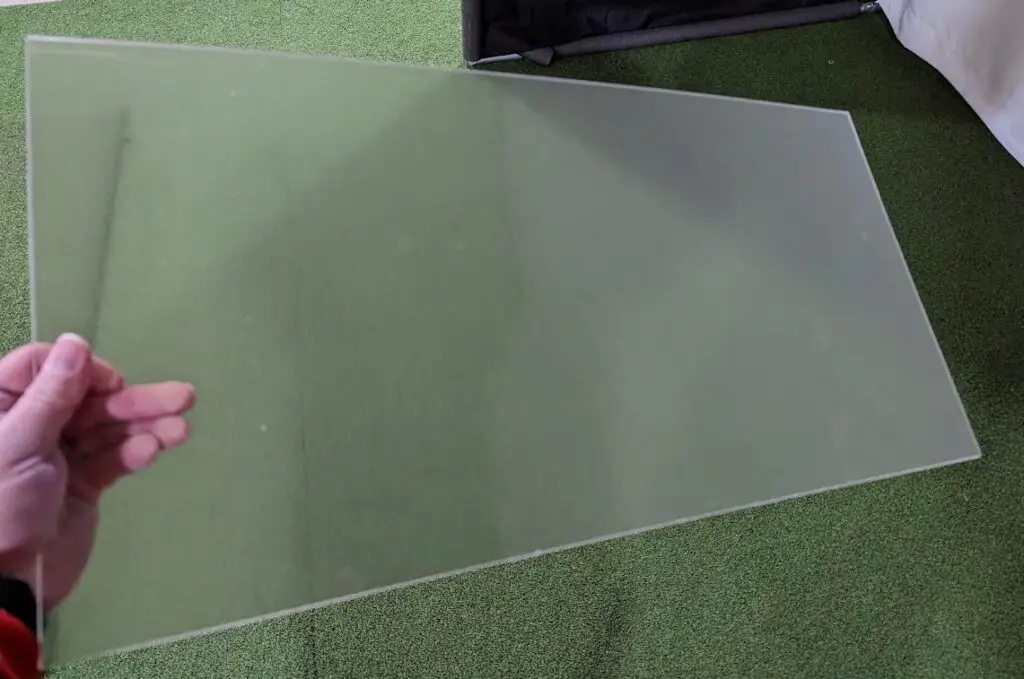
I decided that I wanted to make my DIY golf mat with the dimensions of 12″ x 24″. So that is the exact measurement of the Hitting Strip Turf I purchased from One Stop Sim Shop. Next, I headed over to Lowe’s and purchased an 18″ x 24″ acrylic sheet which is .08″ thick. Yes, .08 thick because they were very limited in stock. They cut it for me at the store to 12″ x 24″ to match the hitting turf. I could have cut the acrylic myself but this just saved some time and effort. I ended up cracking this .08 thickness acrylic sheet (sometimes called Lexan) so I immediately went out and bought what I show in the materials above which is .093″ thickness. This lasted a couple of months and I eventually purchased a sheet with .118 inch thickness which I cut myself. Much much better. Lesson learned.
As mentioned above, I used 3/4″ puzzle mat EVA foam under artificial turf. I had some leftover end strips that I could use on this project. It wouldn’t take much. The deal with the EVA foam is that it has some give but not as much as the weatherstripping foam that I would be using. That foam was picked up on Amazon and is 1″ wide by 3/4″ tall. The mat that I would be inserting this DIY Divot Action Mat into is approximately 3/4″ thick so I wouldn’t want to use 1″ foam if that makes sense. The height would be too much as compared to the mat which I would be standing on.
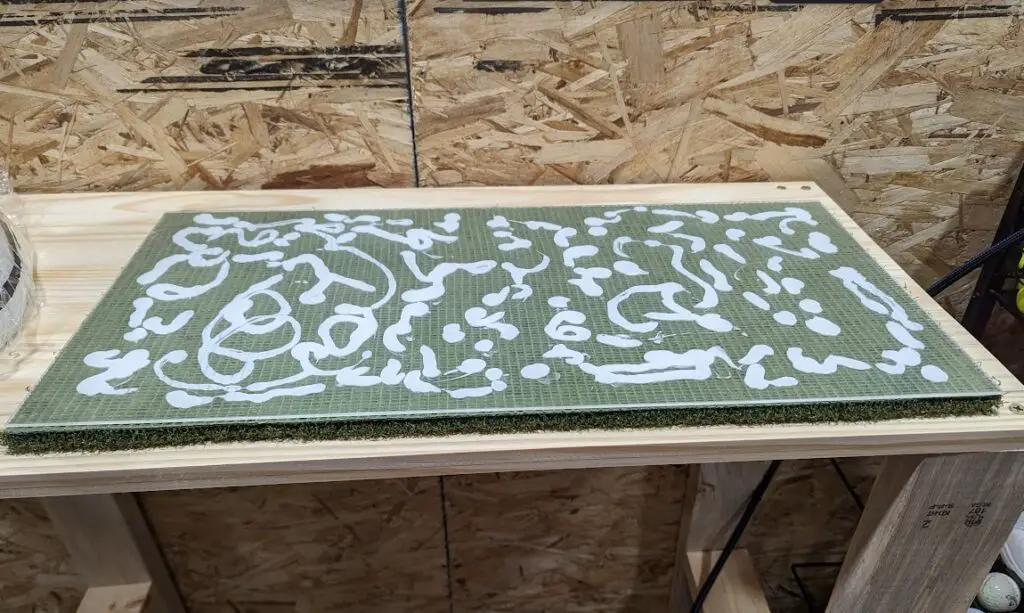
So the first step was to find my caulk gun and use Power Grab adhesive to stick the turf to the acrylic sheet. Note to self and others. The acrylic I purchased had a thin sheet of film on each side, so make sure to remove that first. Again, the sheet of acrylic that I am using has been cut down to 12″ x 24″.
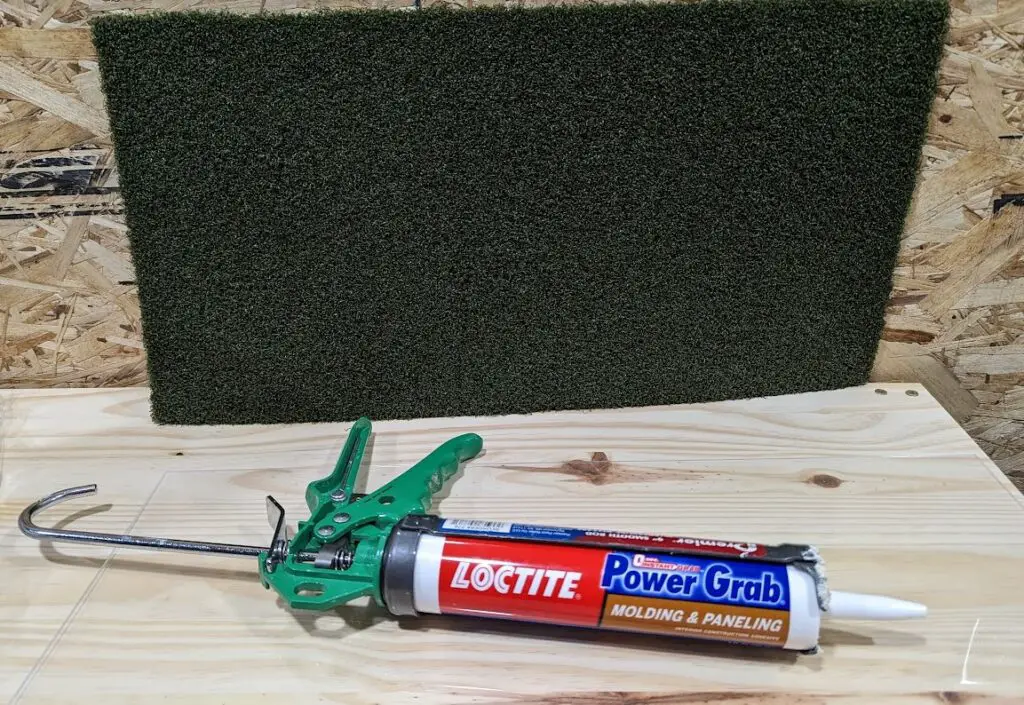
I put the adhesive on the acrylic and then attached to the turf. If I were making this for a customer, I would have used clear adhesive but I decided to use what I had in the garage and what my wife and I used recently to put up some paneling. It works until it didn’t work. I came back 24 hours later and the turf is not going anywhere but in weeks it did. See update for the construction adhesive I now use, near the bottom of this post.
I did a quick mock up of how I thought the DIY golf mat should look. the EVA puzzle mat foam is on the outside and provides a little bit of a brace and the more squishy weatherstripping foam insulation tape is on the inside. Now that I think I like the way it looks, time to put it together.
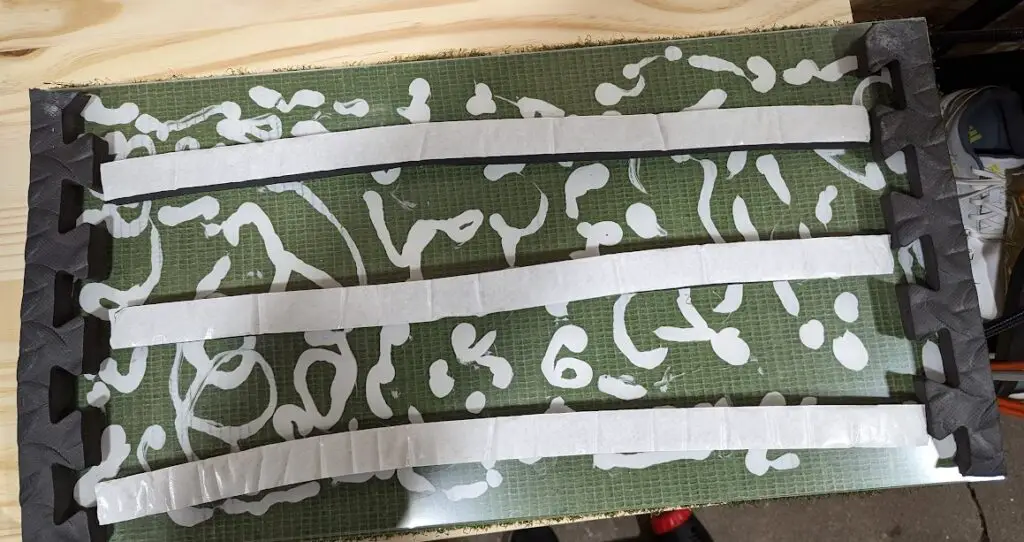
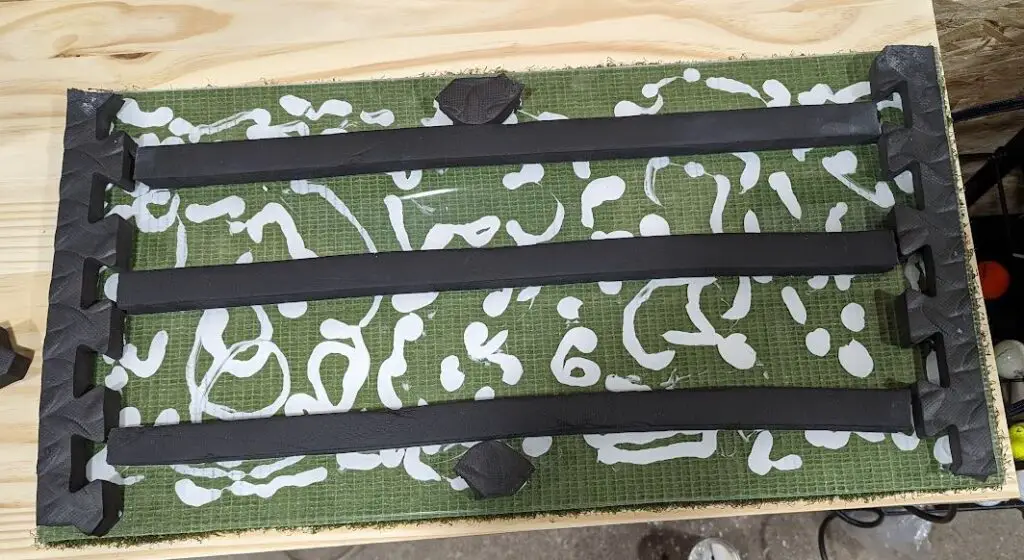
And now everything has been stuck down with the weatherstripping having its own tape and putting adhesive on the EVA foam. I also added a couple pieces of what I am calling bumper EVA foam at the top and bottom (in the middle). I let this sit overnight before moving on to the next step. In the morning everything was secure. I could pick up the DIY golf mat by either the EVA foam or weatherstripping foam and neither were coming loose.
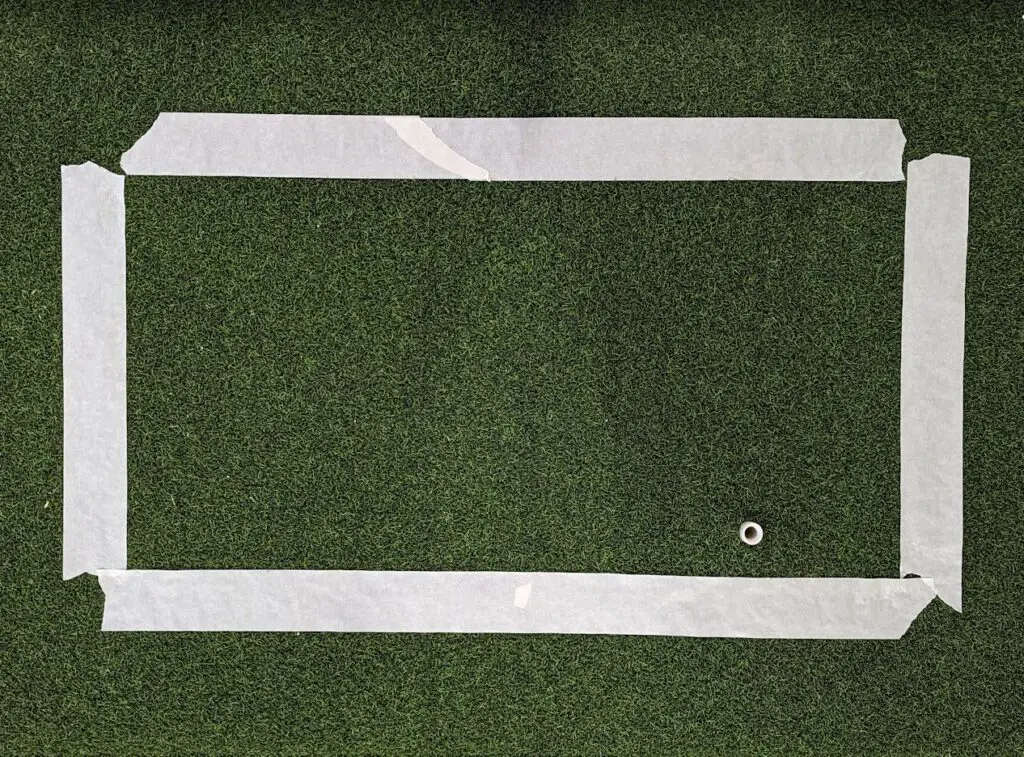
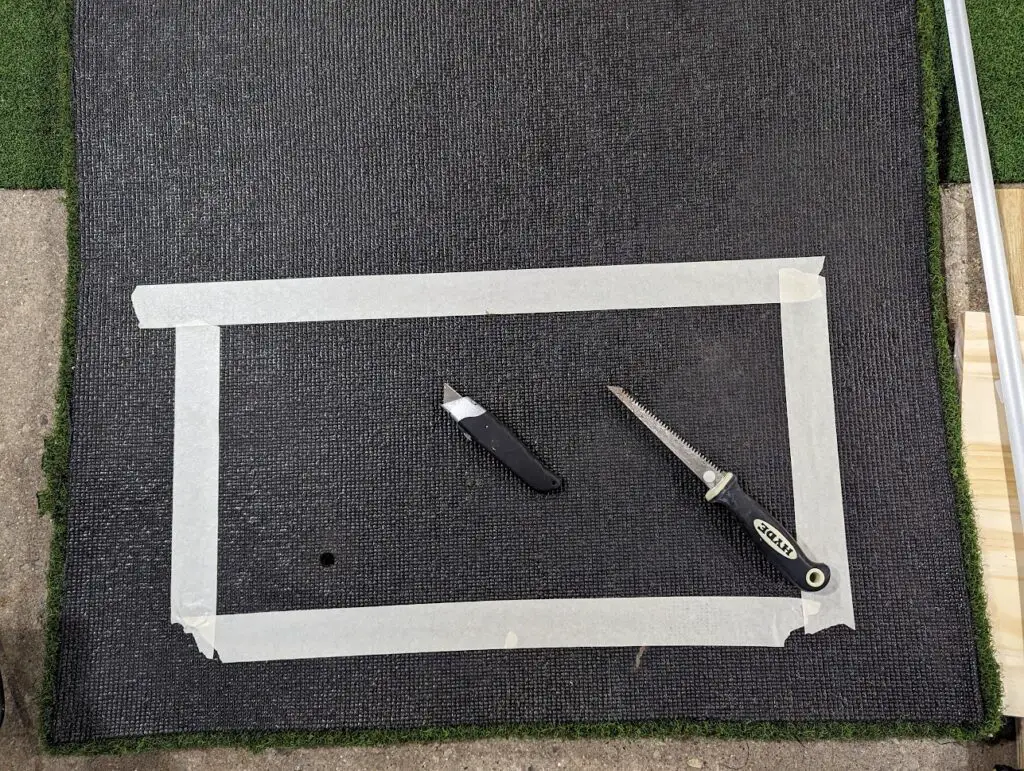
So the next step. I’ll do a show and tell of what not to do, followed along with the correct (or better) way to do this. I put the DIY golf mat on the golf mat I stand on, measured where I wanted the insert to go and then put tape on the mat. So it looked like this.
Now the white part at the bottom right is a tee that I had inserted into the mat I stood on. Worked well until that mat was causing pain in the wrists and wrists. Thus the move to the Fiberbuilt Flight Deck and now this DIY golf hitting mat project. Anywho, so I brought out my utility knife and started to cut out the interior of what I taped off. Only the utility knife wouldn’t cut all the way through. I also came to find the drywall jab saw wouldn’t cut through the turf very well. So hmmmmm. After thinking about it for a minute I decided it would probably work better if I turned the mat over.
Ha. So I went to work cutting out the inner portion on the backside of my hitting mat. So so so much easier. I had it cut out within maybe 2 minutes.
And here is the end result of my DIY Golf Mat. Some online are calling it a DIY Divot Action Golf Mat. I can understand how it might be seen that way.
DIY Golf Mat End Result

DIY Golf Divot Mat Regrets?
Here is a very quick look at it in action. Now… if asked if I would change anything about how I did this DIY divot mat. Yes and no. I wanted my EVA foam and weatherstripping to be at least 3/4 of an inch so it would have plenty of give. Plus the mat I would be standing on is 3/4 of an inch. However if you think about it, with the acrylic and turf sitting on top of the 3/4″ EVA foam and weatherstripping foam, it would make the insert more than 3/4″ tall. Yes, I knew beforehand that it would work out that way but I am ok with it. If I wanted to make it a little cleaner looking, I would find a 3′ x 5′ piece of 1/8″ foam that I could put under the mat (the mat I stand on) and remove a piece where the insert sits.
The Lexan I started with was .08 inch thickness. It was nice and cushiony but a little too bouncy. I knew that from the get-go. It wasn’t going to work for me and didn’t take long before a glancing blow cracked the Lexan. So I went with .093 inch thickness and that lasted a couple of months. Then the mat collapsed on itself and I knew something was wrong. The Lexan cracked. So I went with .118 inch thickness, again purchased from Lowes and haven’t had a problem since. I was a little worried because the cushion feel was not as pronounced with the .118 inch as compared to the previous two thickness but in the end I have had no problems whatsoever with either elbow or wrist pain. So happy camper here.
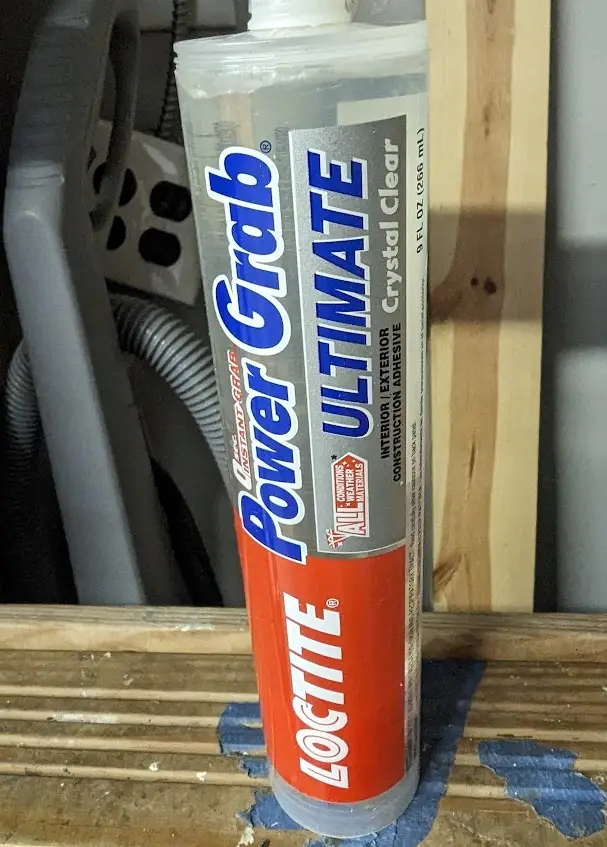
Update: The adhesive I used isn’t the best. The mat started to come loose after a month or so. The foam stayed on fine. hmmmm but the mat needs a stronger adhesive.
This is what I ended up using. Power Grab Ultimate from Loctite.
After all is said and done, the other thing I might like to do is to make a tee for this DIY golf turf. The thought process would be to drill a small hole in the acrylic near the front and rear of the turf and insert an adjustable tee. I would place it towards the rear so it wouldn’t affect the ability to putt using my SkyTrak. Without the adjustable tee I can continue to use Birtee. Wondering what your thoughts are about this DIY golf mat project?
