I picked up some new golf grips and will start putting them on this evening. How long do new golf grips need to dry and just when can I start playing golf with the newly gripped clubs? The short answer is about 6 to 8 hours with grip solvent and I’ll throw in a caveat for later. What I like to say is to re-grip your clubs in the evening and you will be ready to play golf in the morning. It’s what I do.
Give Golf Grips 6 to 8 Hours To Dry with Grip Solvent
Yes, your grips should be dry within 6 to 8 hours if you use grip solvent. The caveat is if you go the route of mineral spirits, it could take up to 24 hours for the golf grips to dry. I often use odorless (is there such a thing?) mineral spirits only because it is much less costly as compared to buying grip solvent.
I typically recommend changing out your golf grips once a year. Of course it depends how much you practice and play golf, along with playing conditions. Are your grips constantly getting wet because of rain and humidity? Are your clubs stuck in the hot car for hours on end? Might want to change them up a little more often.
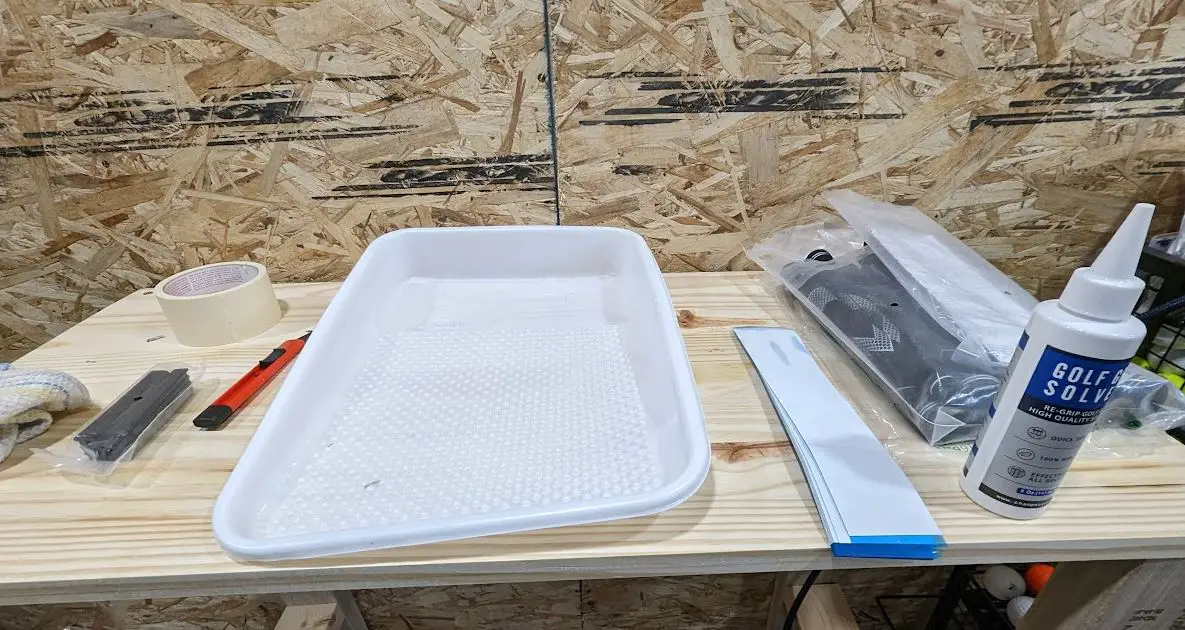
What do you need to change out golf grips?
- New golf grips
- Utility knife or hook blade
- Masking tape or golf tape
- Grip solvent or mineral spirits
- Paint tray liner
Additional items to make installing grips easier:
- Vice
- Golf vice rubber clamp
- Heat gun or hair dryer
- Paper towels or clean rags
- Additional grips
- Bottled up swear words
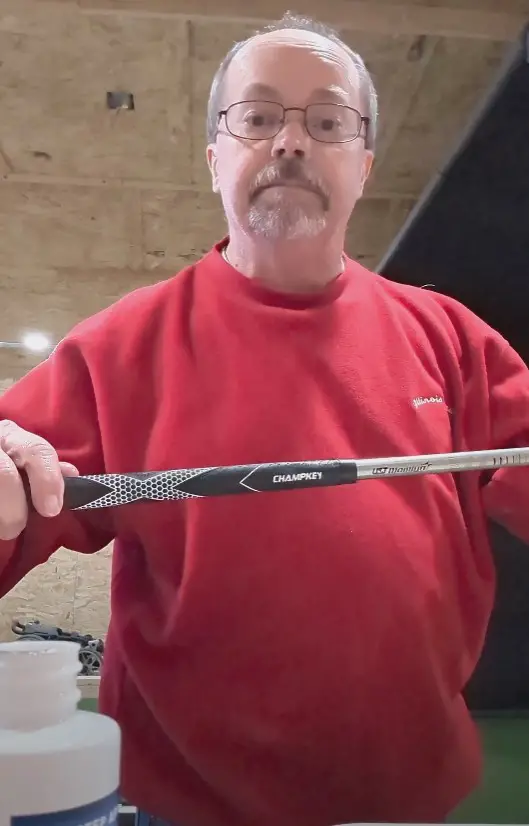
I bought new grips from Amazon. They are Champkey Traction-X Golf Grips and the quality is very good. I purchased the grips as a bundle with the hook knife, grip solvent, tape, and a wedge for the vice. I find that when using golf grip tape or double sided tape that I need a vice to get the grip on. So sometimes I choose to go the route of masking tape.
Let’s Change Out Those Golf Grips
Use the hook blade or utility knife to slightly pull up on the grip on the end closest to the clubhead. If you are working with a graphite shaft, be doubly sure not to cut into the shaft. Once you start the cut into the grip, sometimes you can just grab the grip and pull on up and off. Oftentimes I have to cut into the grip again and am then able to pull the grip off. I say oftentimes because sometimes it works like this… Have you ever tried to remove wallpaper? If all goes well you may be able to pull off a large sheet at a time. When things don’t go well you could be pulling off 1/4″ at a time. Such was the case when I changed out my latest grip. Arghhhh. Just know that going in.
Now it’s time to pull off the tape. This is usually where I run into most of the issues in regards to taking time. Typically I can get the grip and tape off in 2 minutes. I can also get the grip and tape off in 20 minutes. So know that going in. Just peel the tape off and make sure to get the little bits off as well. I use my fingernails for that. If you don’t want to use your fingernails, get the tape wet and use a rag or towel to help.
Pro Tip: Use a heat gun or hair dryer to soften up the tape. Don’t get it too hot that it will burn yourself while taking the tape off but get it nice and warm (evenly) and this should help to remove stubborn tape.
After the tape is completely removed, I like to quickly give it a once over to make sure the shaft looks fine (no gouges) and everything looks smooth, like no fraying of graphite on the butt end.
Add Tape
I’ve used golf grip tape, double-sided tape, and masking tape. While I prefer golf grip tape (which is double-sided), masking tape is easier to use (see below). I make sure the tape is about 1/2″ or so smaller than the length of the grip. When placing the tape on the shaft, I also have about 1/4″ past the butt end of the shaft which I tuck in to the hollow end.
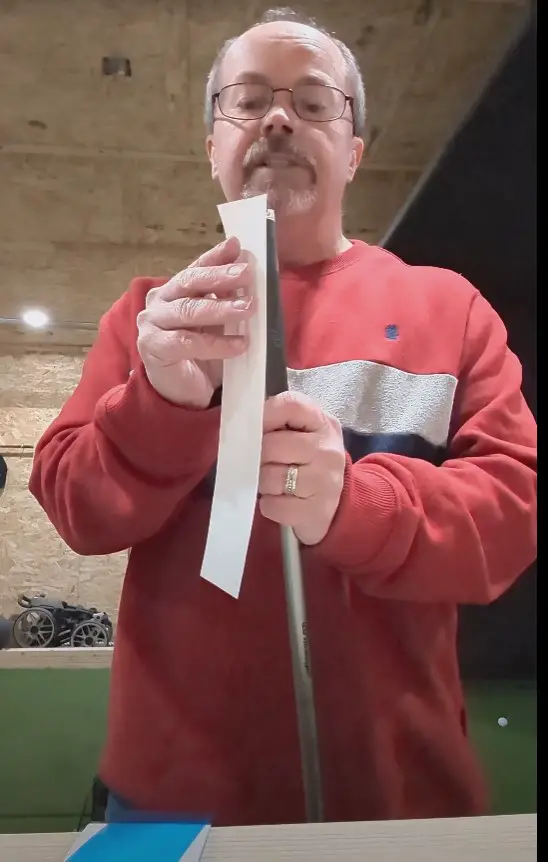
So I place the tape on the shaft and wrap and stick about half of it on at a time. Get creases out as best as you can. Then wrap and stick the other half of the tape. The pieces should just about meet and maybe slightly overwrap each other.
Although many of us know which size grip we normally tend to use and replace like with like, if you want to customize your grip or look into a standard v.s. midsize grip, now is the time to do it. You may find that by simply adding another layer or two of tape (sometimes called building up), the grip may fit better in your hands.
Pro Tip: Now here is where I sometimes run into trouble and why I like to have an extra grip or three on hand. What I mean by that, is you should have no delay between when you put the grip solvent (or mineral spirits) in the golf grip and on the tape and installing the new grip. There are times where I’ve waited (ummm errrr while trying to video how I do this) half a minute or even a minute in the process of putting the grip on and the grip goes on about 3-4 inches and gets stuck. Not a good thing.
All the better if you have a vice and a rubber golf vice clamp.
Carefully secure the shaft in the rubber golf clamp and tighten with the vice. Not too tight but make sure it won’t go anywhere. I like to use a paint roller tray liner to catch any excess grip solvent or mineral spirits. You would rather use too much and be able to pour it back than not enough. Put the paint tray liner under the vice where the grip will be installed.
Golf Solvent or Mineral Spirits
Pour (squirt) some of the grip solvent or mineral spirits in the golf grip while putting your finger over the hole in the end. For this you may or may not want to wear gloves. Sometimes I do, sometimes I don’t. Just don’t wear good clothes or shoes. Pour enough grip solvent or mineral spirits into the golf grip with the knowledge that any extra will fall into the tray liner and you can just pour it back into the bottle for later use. So use a lot.
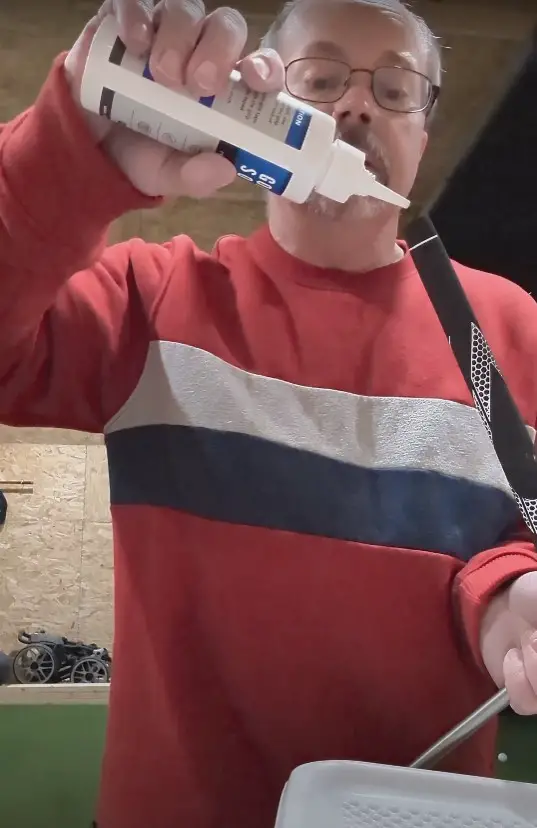
Shake the golf grip a little so it covers the inside of the grip. Then pour whatever you put into the grip on to the tape. Make sure it is nice and soaked.
Pro Tip: Once you start putting on the grip do not stop. Start getting the grip over the butt end and push all the way on. If you stop after you’ve gotten the grip on a couple of inches, most likely you will not get it completely on. Been there done that more than a few times.
Quickly make sure you align the grip the way you would like it to face on the club. Push the grip firmly on to the shaft until the grip is on completely and there is no give or looseness at the butt end. Once again make sure you have the grip (perhaps writing) aligned the way you would like and then tap the butt end of the grip on the ground a few times. This is to make sure the grip is fully seated. Now having said that, be careful doing this with a steel shaft. Any sharpness on the end and you can actually poke the shaft through the end of the grip.
When I have the grip installed and am happy about it, I find a place where I can stand the club up with the grip side down. Sometimes it helps to just put a couple of pieces of paper towels or a rag you don’t mind throwing out on the ground and the excess grip solvent will come out. And there you have it. An easy DIY project to both remove and install golf grips. Just remember to take your time and if need be, change out a couple grips a night and have fun with this.
Once the process is complete, you will need about 6-8 hours for the grips to dry if you used grip solvent. Just a heads up. For whatever reason, I’ve found that if you use mineral spirits sometimes you need to wait up to 24 hours for the grips to dry.