My workplace likes to have meetings where they get everyone involved, especially around the holidays. I’m more of what you might call a loner or the quiet one. Fine one on one but when you put me in a group setting, in general I don’t talk. So today we have a virtual carve the pumpkin meeting. Actually, I’m not sure if it is a meeting or a contest. We were also told we could paint a pumpkin. I had an idea. A DIY golf pumpkin. Did I mention I have no artistic ability?
Find A Good Pumpkin
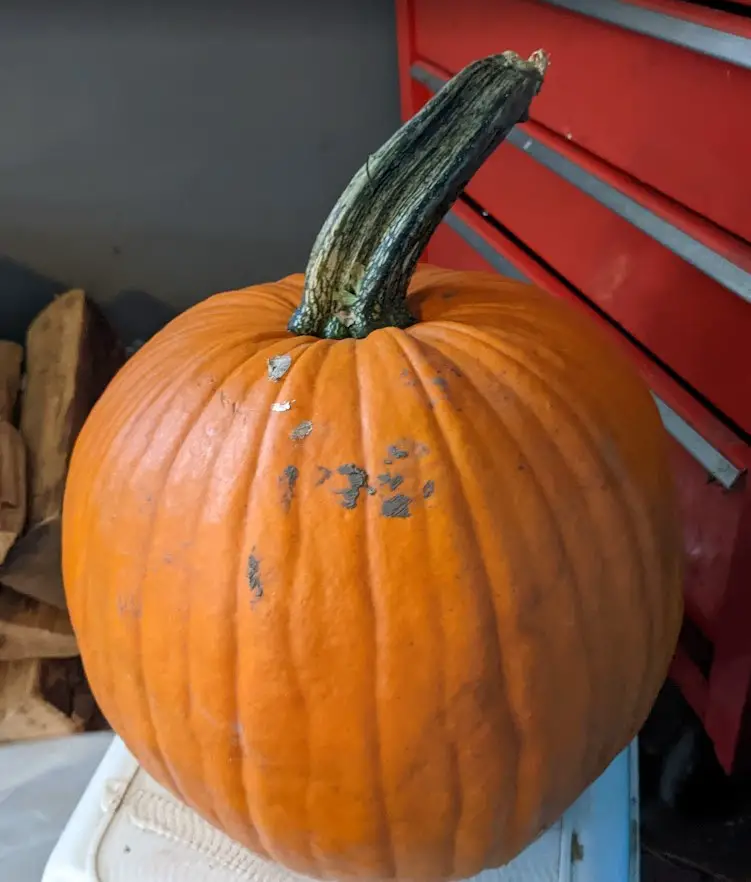
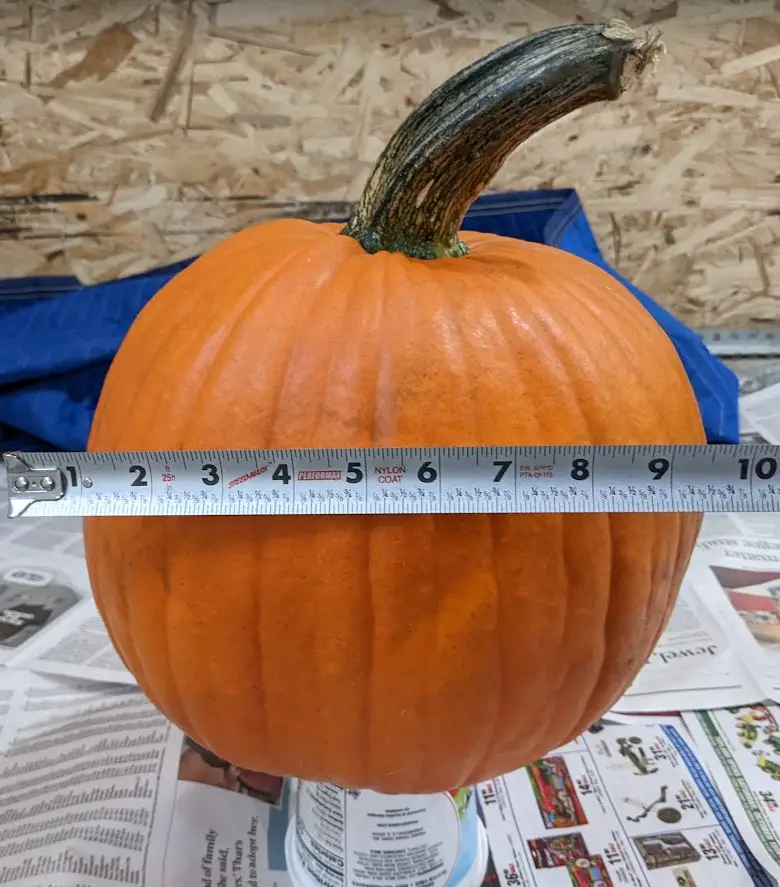
Here’s the pumpkin my wife and I picked up for $6. Literally today. So one of the sides is a little pushed in and it has some nicks and gouges here and there. It should work out well.
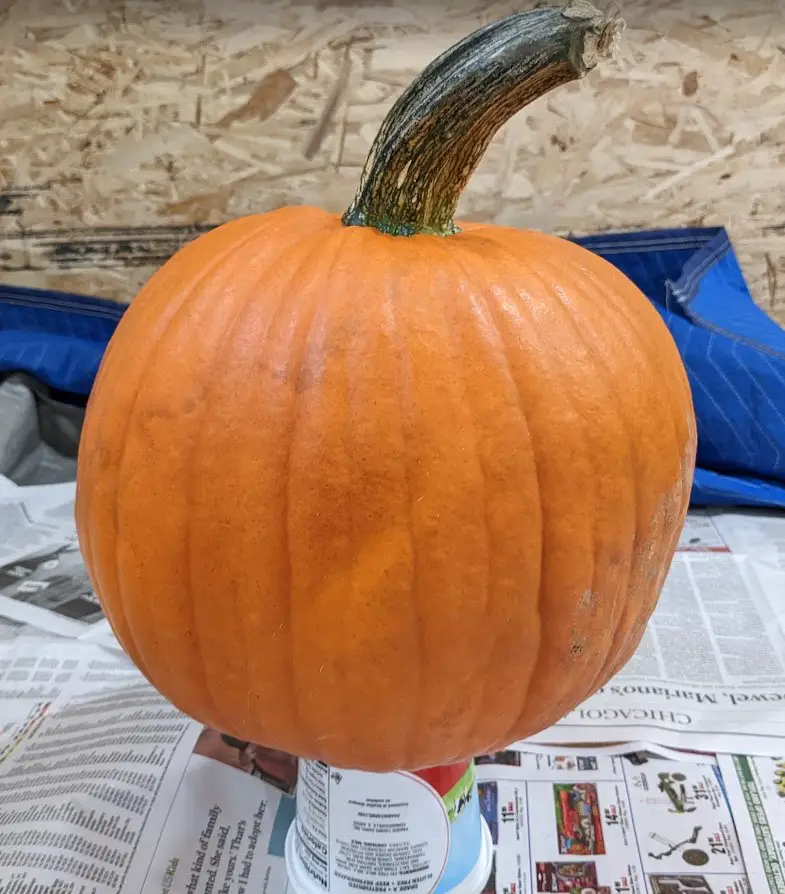
I had an idea. It’s not my original idea. But again this is for work ugh and I like to think about my hobby rather than work. So a Halloween golf pumpkin shall be made. My wife cleaned up the pumpkin nicely. I took the pumpkin out to my golf cave and covered up the SkyTrak, Fiberbuilt, golf mat, etc… The pumpkin is sitting on a cottage cheese container and is all ready to be painted. Kinda flying by the seat of my pants here.
Definitely not exact but somewhere around 8 1/2 inches long. My thinking is a golf ball is about 1.68 inches long. Why am I saying that, I dunno.
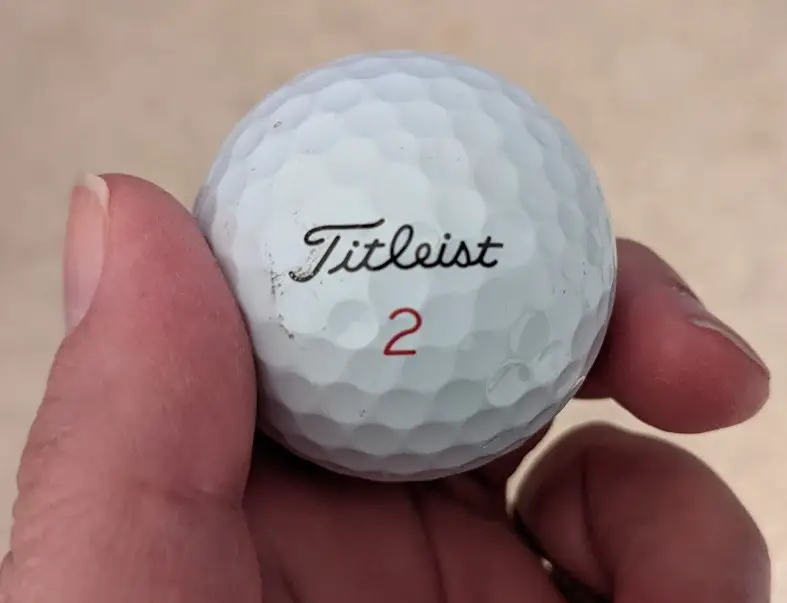
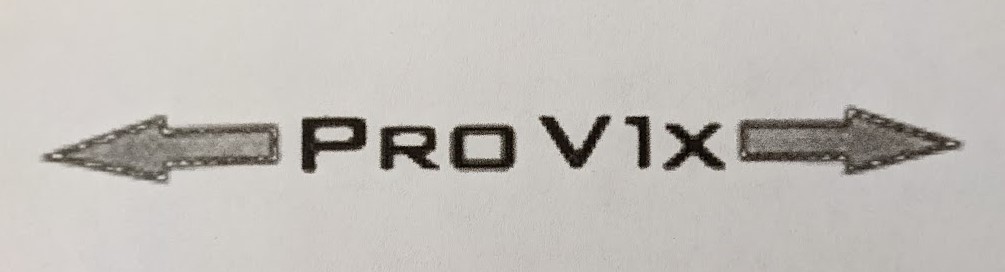
Maybe because I sorta want to pattern my pumpkin after this. Not a golf ball I routinely buy because it is out of my price range but this is a Titleist Pro V1X. I may or may not (cough) have found this one when I was looking in the woods for my tee shot.
Inspired By Titleist
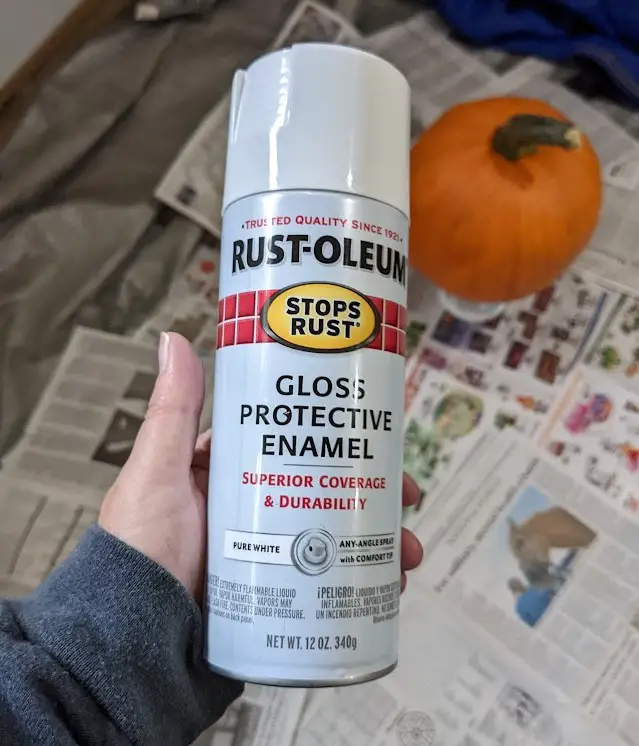
Again. The flying by the seat of my pants says my golf ball is glossy (if you take away the scuff part) so my pumpkin should be glossy as well. So we visited Walmart and the cashier gave me the once over to make sure I didn’t look like the kind who might sniff this stuff. Price was about $6.95 off the top of my head.
Covered the pumpkin stem with masking tape. Not exactly sure why but then again. Flying….
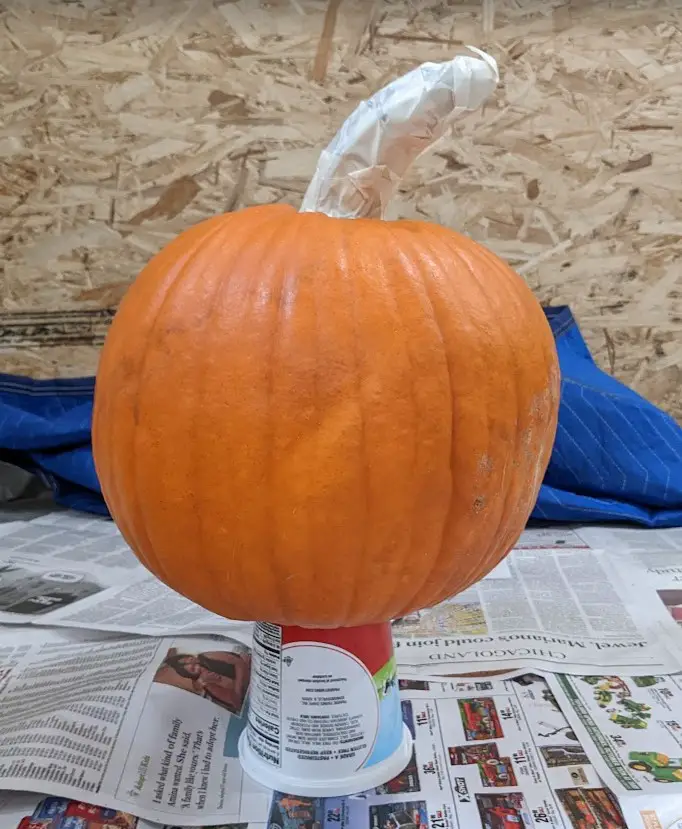
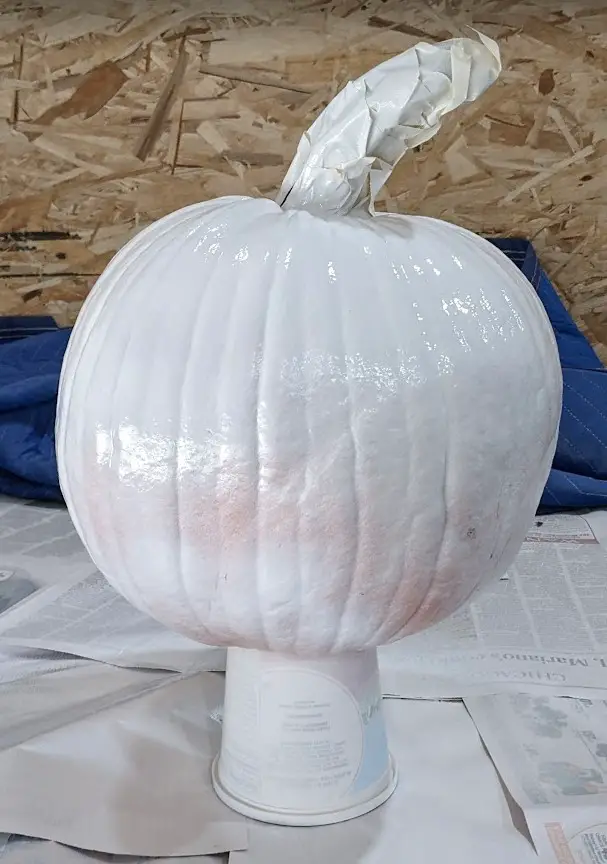
Here’s the pumpkin after the second coat of paint. Followed the directions. Said 10-16″ away as I was spraying. Did what I considered a light coat. Didn’t look too bad. Some orange coming through and I didn’t do so well near the bottom of the pumpkin. Figure I’ll probably get a couple or few more coats on here. Letting plenty of air get through in my golf cave because the odor is a little strong.
Measuring a Golf Ball and Titleist Logo
In the meantime between all that 1.68″ of a golf ball and 8 1/2″ pumpkin I had to figure out some measurements for the Titleist logo. I’m not trying to be exact, just close and have it look good. After doing this and printing out what I thought could work for a template (after doing some calculations for the pumpkin), my wife said if she were going to be cutting out the template and doing the painting, she would want it to be slightly larger.
![]()
Why is my wife doing the painting you ask? Ummm errrr cuz I have to work and got a late start on this. So something like this template (cutout) with inserts for the letters l, e, and s. This DIY golf pumpkin seems to be coming along just fine. At least in my head.
![]()
My wife hasn’t cut this one out as of yet because I just finished printing it. I put the last coat of paint on about 5 hours ago but the paint itself is still very tacky.
Painted Halloween Pumpkin
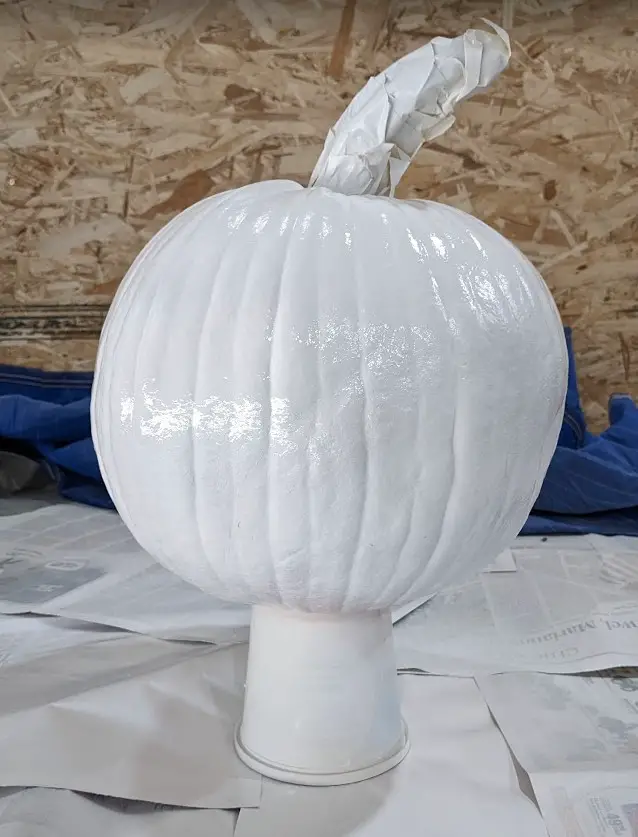
And doesn’t she look good? Very shiny after 4 coats of paint. I really need a day for this to dry. We just brought it in the house because my golf cave was about 55 degrees. Wish we had another 24 hours for this to dry but we’ll (my wife) have to make do when painting on the letters. So we let it dry for maybe 12 hours and it is still very tacky. Maybe it is the paint I used or maybe because it has been sprayed on a pumpkin but yeah, this isn’t good because it is still slightly damp.
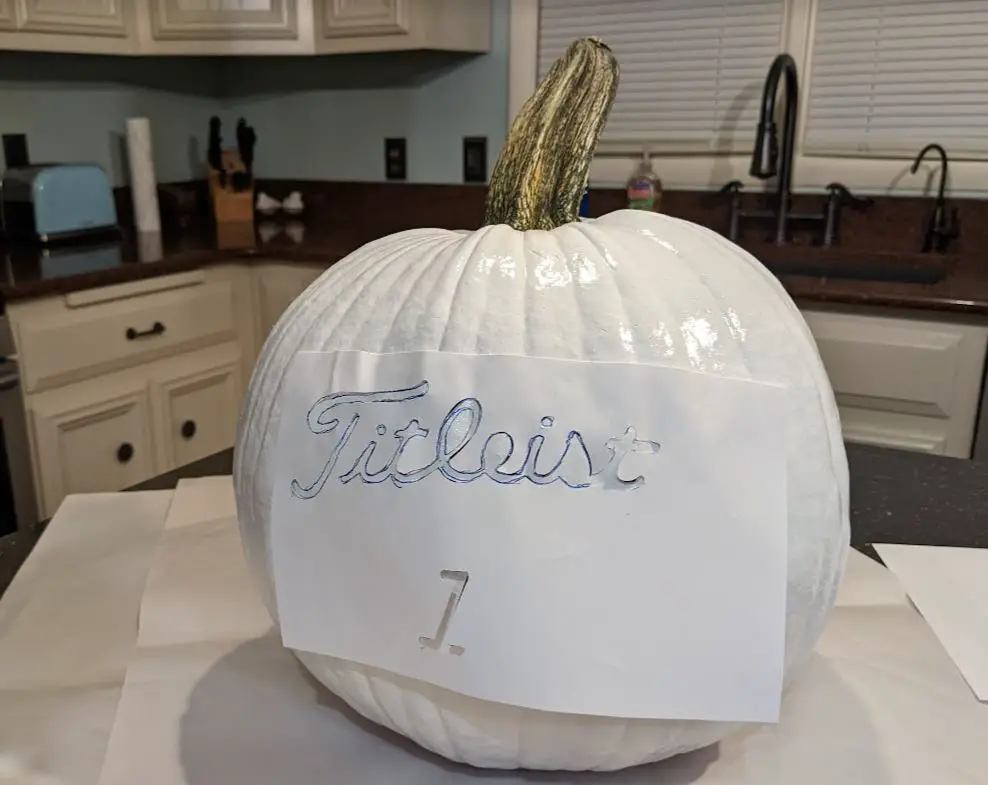
Here is the pumpkin in the house now. There is probably a better way of doing this and maybe I wish I would have been able to print this on wax paper. Either way, my wife has taken on the task of outlining and then painting the Titleist logo.
Arghhhhh. Paint coming off. My worst nightmare. Note to self: Next year give this a few days to dry.
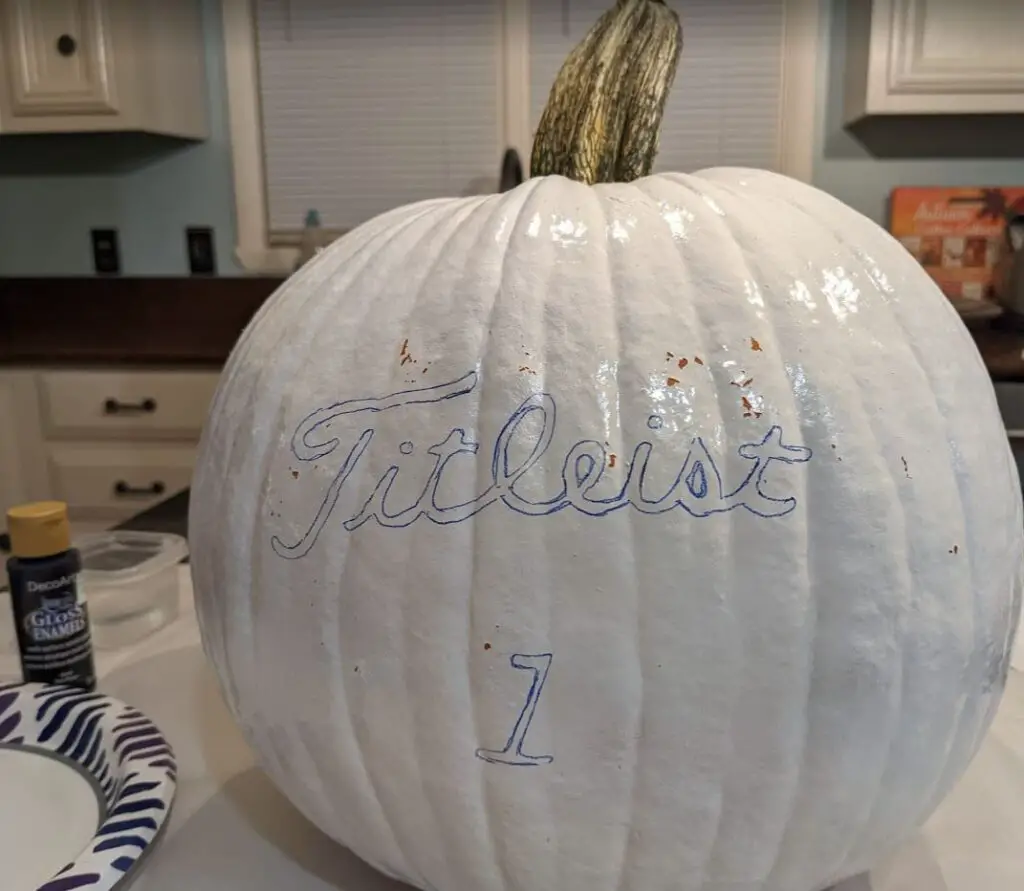
This is a work in progress. My wife says her hands aren’t so steady and maybe she should have used an airbrush. I dunno. Looks most excellent to me.
![]()
I noticed in some cases the lighting seemed off. Makes sense. Some of our light bulbs have an orange’ish tint and this next picture brought on the glare. My wife dabbed on some white paint to clean up the places where the paint had peeled off of our golf ball pumpkin.
The outline was done and now the painting of the PRO V1X. Again, darn white paint peeled off.

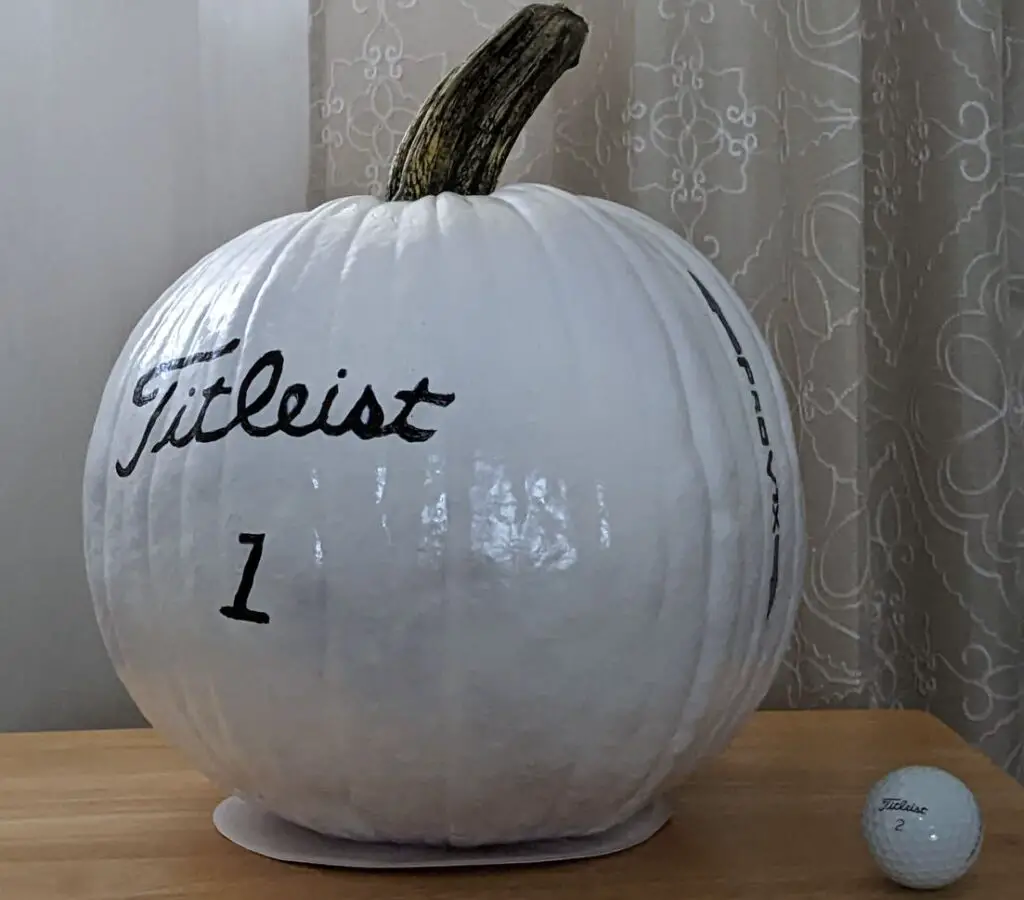
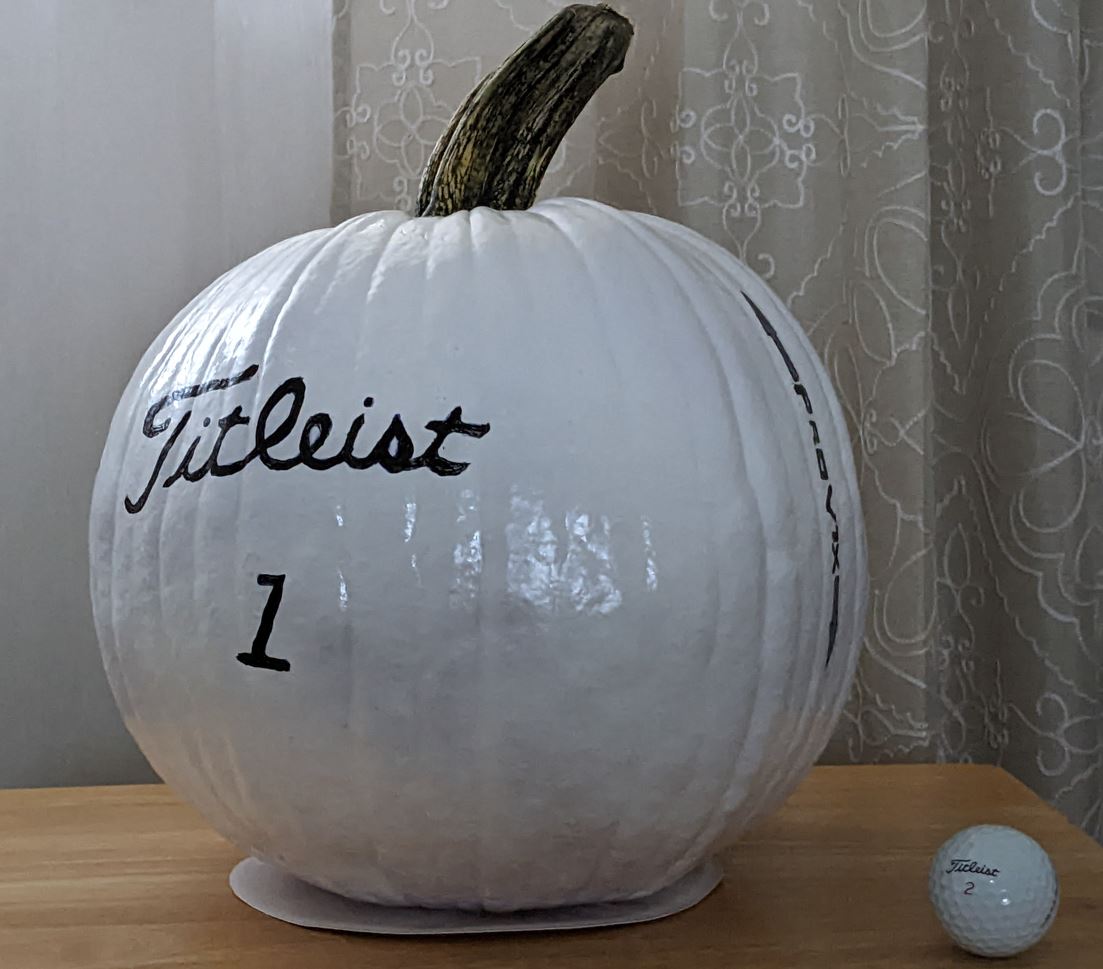
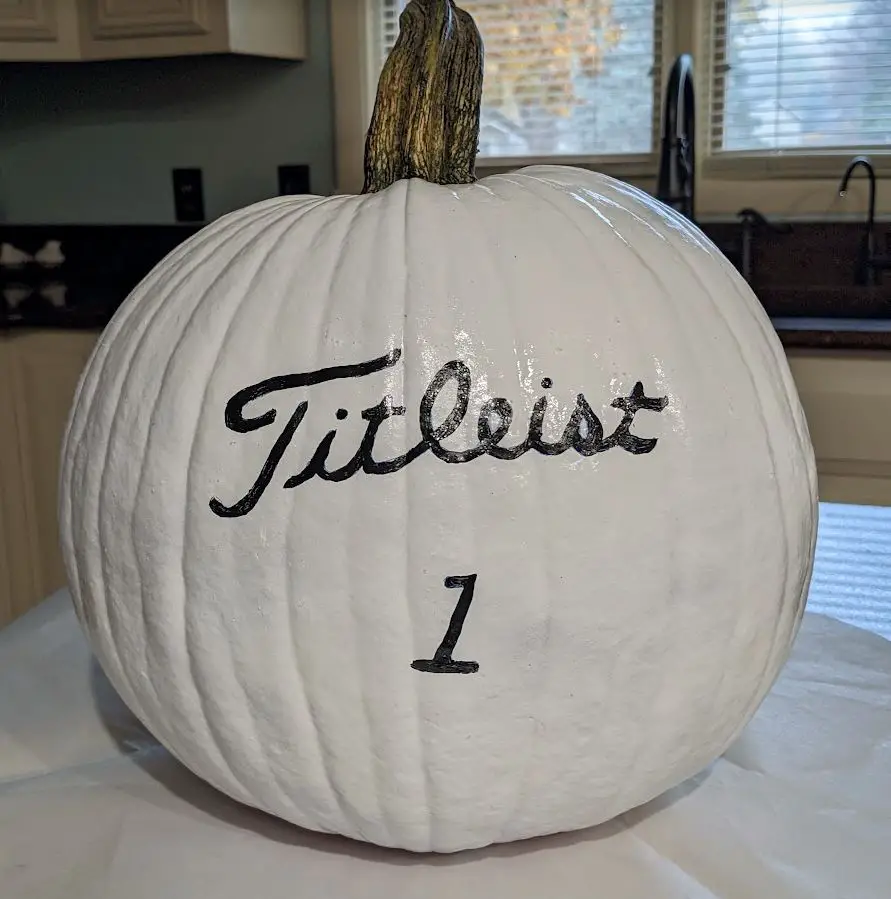
Not bad for a first time effort. I think this will be acceptable for our work pumpkin carving or painting event. Here is our DIY Golf Pumpkin. Maybe you came across this post simply looking for some golf Halloween images or something similar. My hope is that you may want to attempt and improve upon what my wife and I have tried. I’ll take some more pictures to see if I can get away from the glare.
You know what, as I look at this I am more than happy with the effort and outcome. Hmmmm…. Wondering what it would take to do something similar next year but add dimples? Let me know your thoughts.