Golf clubs are expensive. Between irons, a putter, hybrids, woods, and driver we can easily spend $1000 or more on our passion. Yes, I hear some saying I spent more than half of that on a driver this year. I get it… as I search for a Scotty Cameron putter. When things go wrong like your bag falling out of a golf cart or through wear and tear, your clubs may need to be fixed. I’m talking about grips, the shaft, and the head of the club along with the ferrule. But rather than hauling your clubs off to a golf shop, why not learn a little DIY golf club repair and save a few bucks?
I always recommend taking care of your own golf clubs if you are a DIY type of person or just want to save a few bucks. Another simple DIY to keep your clubs in tip top shape is simply to keep them clean by following something like this DIY Golf Club Washer after every round.
DIY Golf Club Repair Ferrules
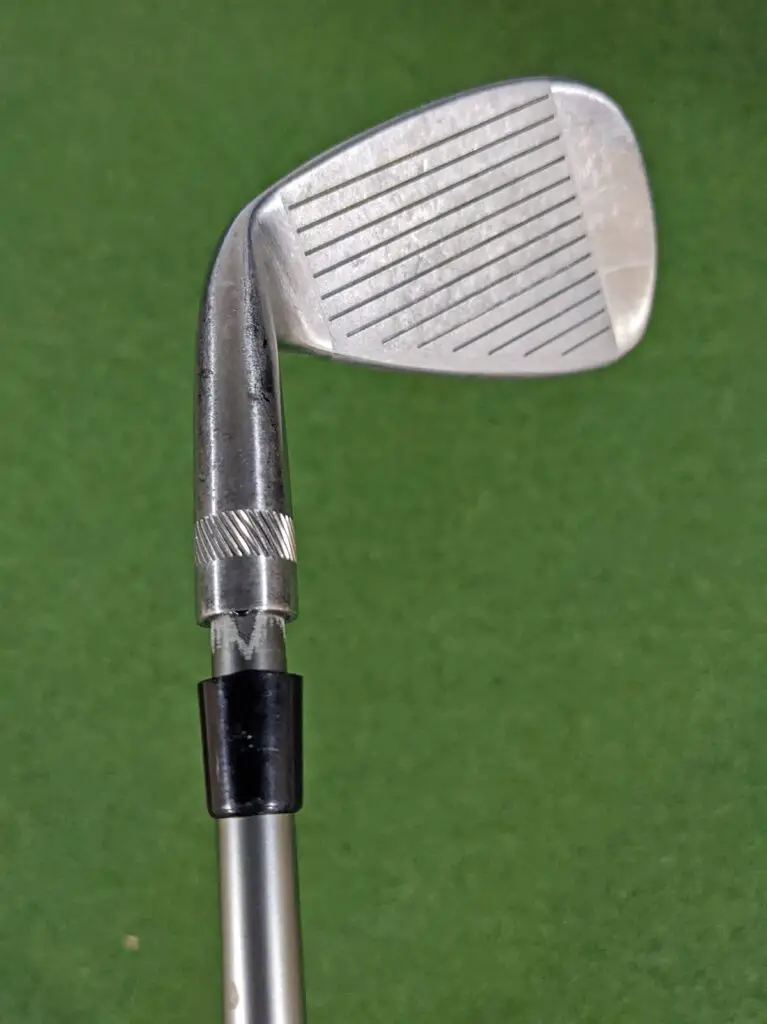
At the end of this golf season (still hoping for an outing or two with decent weather) I didn’t need to take too good of a look at my clubs to see a couple of ferrules had come loose. More of a vanity thing because so far as I know, the ferrule just sits on the shaft as a tie-in with the shaft and clubhead. Do you want a black, blue, double stripe, etc… In regards to DIY golf club repair, this is an easy fix. Nothing wrong with the ferrule itself and I don’t want to take the clubhead off to put a different ferrule on. Plus I checked (twisted) the head and it does not move.
So basically you are going to want 2 things. Ahhhh. Let’s make it 3. Darn it 4. Did I say 5. But I told you this is easy and it is.
- Utility knife
- 2 part epoxy which can either be golf epoxy or Gorilla Glue epoxy
- A small popsicle stick or perhaps piece of cardboard
- Cheap latex rubber gloves
- Paper towel or two
Easy Peasy Ferrule Fix
I use a utility knife to scrape off any dry epoxy which may you still may be able to see. I could put my pinky finger between the ferrule and hosel and could feel some of the dry epoxy on the shaft. So I carefully just scraped some epoxy away and went over it with a dry towel. You may not feel any epoxy and if that is the case, this step can be skipped.
Then take your 2 part epoxy and measure out a bit and mix according to instructions. Sometimes they give you a mixing stick and at other times you might need a popsicle stick or even a piece of cardboard that came with the epoxy packaging. Remember, you only need enough to go around the shaft between the ferrule and hosel. At this point you may want to put a couple of thin rubber gloves on.
Take your popsicle stick or cardboard and dab it in the epoxy which you have mixed. Put epoxy on the shaft between the ferrule and hosel of the club. I slowly spin the club as I’m doing this to make sure I am getting some epoxy in that space between the ferrule and hosel. This entire process should take no more than 10 seconds. Then push the ferrule (good idea to have some thin rubber gloves on now) to meet up with the hosel of the clubhead. As an aside, the reason why you don’t want to take too much time while putting on the epoxy is that it can often set very fast and make it difficult to slide the ferrule up to the hosel.
Once the ferrule has been pushed up to the hosel, spin the ferrule slightly to make sure the inside is coated with epoxy. Now take out your paper towel and clean up any excess epoxy that may have squirted out either on to the ferrule or hosel. Go over it a couple of times. You are done! Congratulations!!! The whole process should not have taken more than a handful of minutes and it gets easier as you do more. If you do happen to get too much epoxy on the ferrule or hosel you can go over that spot with some mineral spirits.
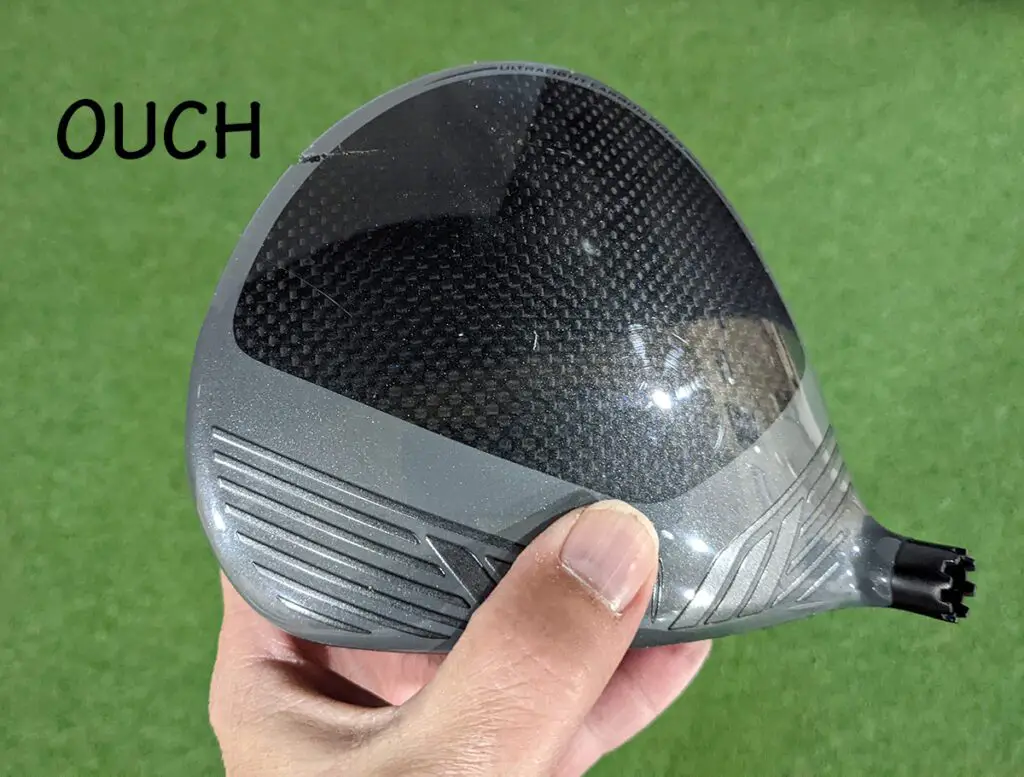
Ouch – Broken Driver Head
This is what happens when your golf bag goes flying out of the golf cart. Not happy on this one. It is a simple DIY with removing the head with a torque wrench and putting a new one on its place. The not so easy part is finding a new Cobra King F8 head is going for $225. That is a big ouch.
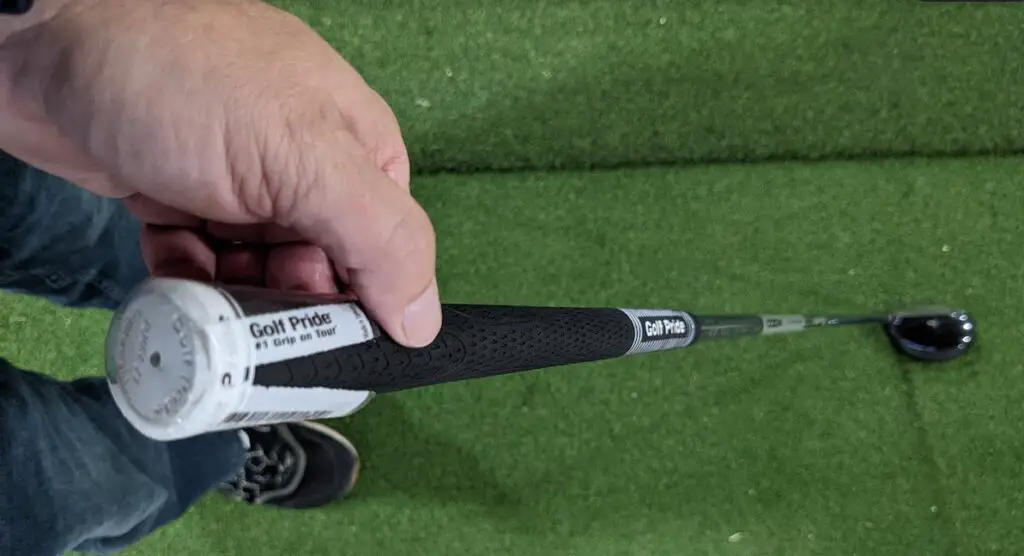
DIY Regrip a Golf Club
In a previous post I shared how to regrip a golf shaft in fairly decent detail with plenty of pics so I won’t go over the entire process here but this again can be a 10 minute or less DIY golf club repair if you have the right tools.
I recommend to have the following on hand when regripping a golf club. Golf grip tape or masking tape. Utility knife or a hook blade, grip solvent, and new grips. Wearing thin rubber gloves is also probably a good thing. There are other ways of removing or adding a grip and you can see that in the above mentioned post but otherwise this is an easy DIY if you are careful. The careful part means to take your time and watch what you are doing with the utility knife or hook blade.
- Golf grip tape or masking tape
- Utility knife or hook blade (hook blade recommended for a graphite shaft)
- Grip solvent
- Rubber gloves
- New grips
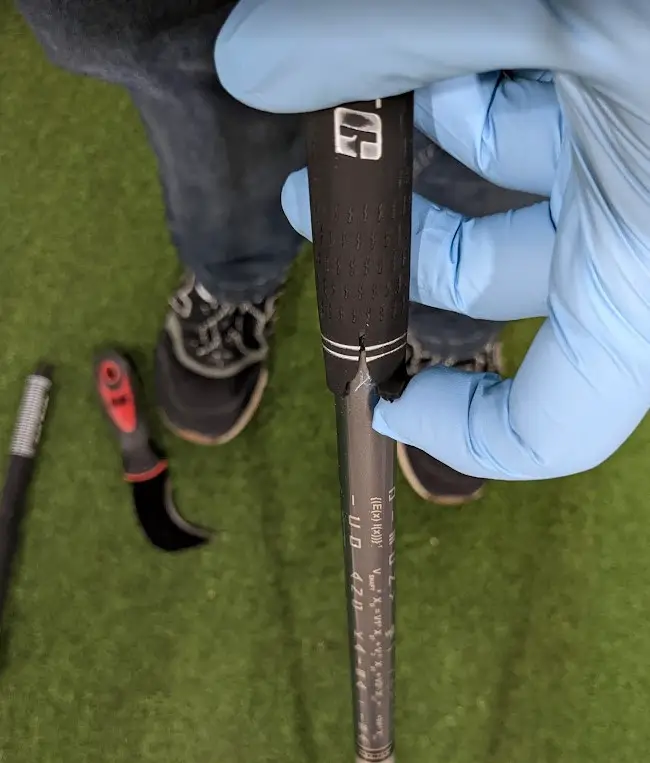
Either place the club (shaft) within a rubber vice clamp wedge in a vice or you can do this by putting the head of the club on the floor. Put the head within a towel if you are worried about damaging your club. Grab a utility knife of hook blade. A hook blade is the choice for graphite clubs just to lessen any nicks into the shaft. Start by cutting into the grip as seen in the pic below. Once you’ve cut into the grip like I have, see if you can pull it all the way off. You may have to cut into the grip a couple more times until you are able to pull it off in its entirety.
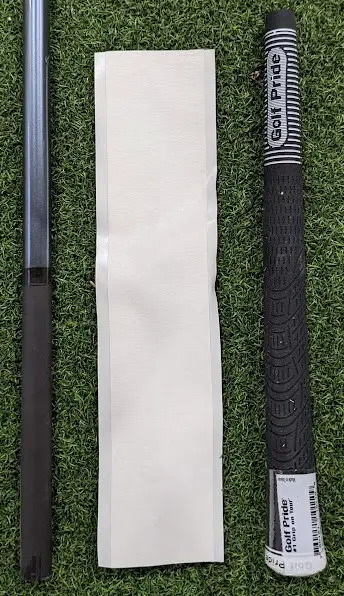
The lazy way of doing things is to leave the tape on and start by putting on a new grip. The right way of doing things is to remove the tape. This is the part that usually takes me the longest. Take your time and use your fingernail if you need to scrape lightly. I’ve had the tape off in 30 seconds and I’ve struggled for 7 to 8 minutes. Just depends how sticky it is.
Grab the golf grip take or double sided masking tape along with your new grip. If you purchased the golf grip tape then it will most likely be cut to size. If not, cut masking tape to about 1/4″ less than the length of your new golf grip and maybe slightly larger than the circumference of the golf shaft where you will be placing the tape. Put the new tape on and allow about 1/4″ to extend past the end of the shaft. Tuck that extra 1/4″ into the end of the shaft. It helps catch excess water perhaps when it is raining.
Now that you have the tape on, coat the tape in grip solvent. Get it nice and wet. Use a catch pan, Tupperware, etc… if you want to catch excess solvent and be able to use it again. Put your finger over the hole in the grip and pour solvent inside the grip as well. Again, any excess can go in a catch container to be used later. Now quickly start putting the grip on over the end of the shaft and push down until it is all the way on. Make sure it is all the way on. Then twist the grip if necessary to get it lined to the clubhead as you would like. I like the end result! One club down and about a dozen to go.
DIY Golf Club Repair – Club Head Removal
Let’s move up a step in difficulty. Actually, this isn’t very difficult at all. I’m talking about removing a club head. Now this may be because the club head is loose, you want to put a new shaft on the club head, or you want an entirely new club head. For this post, I am assuming a steel shaft. It is much easier to work with a steel shaft and doesn’t require the tools (graphite shaft puller) you would need in working with a graphite shaft.
So what do we need for this job?
- Micro butane torch or heat gun
- Thick glove or gloves if using a heat gun
- 5/16″ drill bit and drill
- Wire hosel brush
- Golf club repair epoxy or two part epoxy
Now removing a club head from a steel shaft can be done in a couple of different ways. I used to use a heat gun. In fact it is in my golf cave at this very moment. You simply move the heat gun around the hosel as you twirl the club a little. It might take three or four minutes before the epoxy loosens up enough that you can pull the club head off the shaft. There is a slight problem with using a heat gun. A heat gun does not pinpoint the heat. So you must wear a heavy glove or you will burn yourself when trying to remove the club head. The other thing is you will melt the ferrule. Not a big deal to me because I always replace the ferrule when removing a club head.
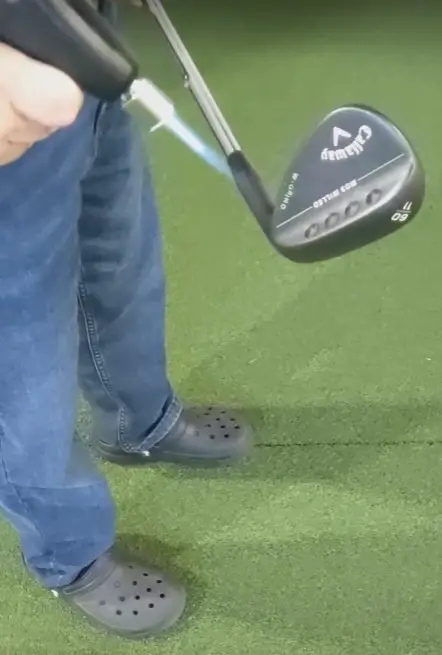
The other option is to use a micro butane torch. Mine is just a cheap torch but it does the job fantastically. You can pick up a micro butane torch over on Amazon for around $25 or so. You will also need some butane which I purchase at a big box hardware store for about $5. The micro butane torch is quicker than the heat gun, pinpoints the heat with much more precision, and I’m able to remove a club head without wearing a glove. It takes me about maybe about 1 1/2 to 2 minutes to remove a club head with a micro butane torch in most cases. Below is a pic of me using the torch to remove the club head on my 60 degree Callaway wedge.
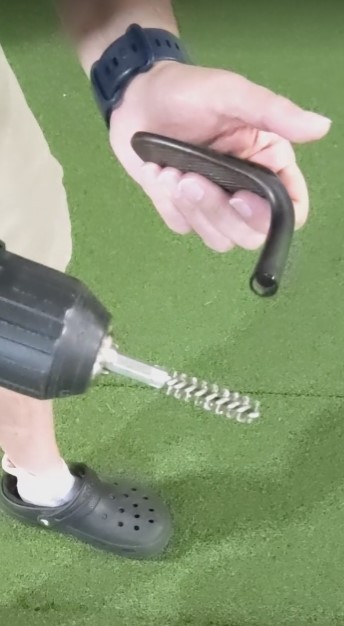
Once the club head is removed, I use a 5/16th drill bit to help loosen some of the epoxy debris. So just put the drill bit within the shaft that attached to the club head and run it at a slower speed. Then follow that up with a wire hosel brush. At this point, I feel confident I’ve cleaned out the hosel and it’s time to replace the club head. Typically I replace like with like, meaning I will replace the same club head on the same shaft. It does give me an idea of changing out a club head let’s say to try a Mizuno or Srixon 785 but then I have to make sure the tip size of the shaft is compatible with whatever iron I might buy.
DIY Club Head Install
Alright. Back to the task at hand. We are simply replacing the club head on the same shaft, a steel shaft, so there is no need to roughen up the tip. If putting the club head on a new steel shaft (not graphite shaft) I would lightly roughen the tip of the shaft with sandpaper. Then get your golf club repair epoxy or two part epoxy and mix enough to put on the shaft where the club head will attach as well as inside the hosel of the club head. Don’t forget to have enough epoxy for the new ferrule as well.
What I do is a dry run to start off with. So I put the ferrule on first followed by the club head. From there I have an understanding of where (how far up) to put the epoxy on the shaft. Remove the ferrule and club head. Put epoxy from the end of the shaft all the way to cover where the club head will be and ferrule. Also, put some epoxy in the hosel of the club head. Install the ferrule, followed by the club head. Put the butt end of the club (grip) on the ground for a slight bit of leverage and make sure the club head is on all the way. Then line up the club head to the grip. All done! Store the club head up in a warm dry place and give it 24 hours for the epoxy to cure before playing.